Step-by-Step Guide on How to Test a Voltage Regulator on a Lawn Mower: Is the battery of your Lawn Mower dying frequently? Then there may be something wrong with the voltage regulator. This article will guide you if you don’t know how to test a voltage regulator on a Lawn Mower.
A voltage regulator controls the range of power transmission of the battery in a Lawn Mower. Likewise, with all-electric devices, it also can turn bad. To be sure, you need to test it. This article will assist you in testing the voltage regulator with a step-by-step guide.
Contents
- 7 Easy Steps How to Test a Voltage Regulator on a Lawn Mower
- Step 1: Precautions
- Step 2: Locate the Battery
- Step 3: Attach the Multimeter
- Step 3: Attach the Multimeter
- Step 4: Turn on the Lawn Mower
- Step 5: Check the Readings
- Step 6: Attach the Multimeter to the Voltage Regulator
- Step 7: Test the Regulator
- Conclusion: How to Test a Voltage Regulator on a Lawn Mower?
- Can a Bad Voltage Regulator Cause Battery Drain?
- What happens if you have a bad voltage regulator in your Lawn Mower?
- What is the difference between a regulator and a rectifier?
7 Easy Steps How to Test a Voltage Regulator on a Lawn Mower

If your Lawn Mower doesn’t perform well, that doesn’t necessarily mean the voltage regulator is faulty. When the battery runs out quickly, even with proper charging, test the battery first. If it’s okay, move on to checking the voltage regulator.
Many of you may think, that testing the voltage regulator straight is the correct way. But that’s not the case. Sometimes the voltage regulator may not work due to faulty batteries.
Before you start testing the battery & the voltage regulator, ensure you have a multimeter. This is the only tool required for testing.
The following is a step-by-step guide on how to test a voltage regulator on a Lawn Mower:
Step 1: Precautions
First, you need to take some precautions so that you don’t cause any accidents. Don’t work with bare legs. If possible, wear gloves to avoid shocks. Also, don’t do this with wet hands. After taking all the precautions, get the Lawn Mower for testing.
Step 2: Locate the Battery
As you will test through the battery, locate the battery first. The voltage regulator will be attached to the battery. It shouldn’t be tough to locate. Usually, you can find the battery under the hood or seat. If you need help, check the user manual to know exactly where the battery is in your specific model.
Step 3: Attach the Multimeter
Step 3: Attach the Multimeter
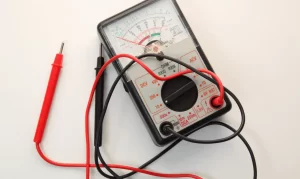
Now, attach the wires of the multimeter to the battery. Attach the positive cable of the multimeter to the battery’s positive terminal. Do the same for the negative cable and terminal of the multimeter and the battery. Ensure that you have attached the correct wires.
Step 4: Turn on the Lawn Mower
To know how much voltage is generated, you need to turn on the mower. Don’t start mowing at first. We need to check the readings on a light load first.
Step 5: Check the Readings
After switching, check the readings on the multimeter. It should be around 12 volts. If you get 12 volts readings, it’s a positive sign. But that doesn’t mean your battery is okay. You’ll have to do more testing.
Now start the mower. With the machine turned on, the readings will increase. It should be around 13-14 volts. Higher than this means there’s something wrong with the battery. And if it’s lower than 13, that means the battery is getting weaker.
So, if you find the battery faulty, work on changing it first. If it’s okay, then move on to the next step to test the voltage regulator of the Lawn Mower.
Step 6: Attach the Multimeter to the Voltage Regulator
Unattached the multimeter and attach it with the voltage regulator. You’ll find the regulator behind the battery. Usually, they’re attached together. Then follow the next step to test the voltage regulator on a Lawn Mower.
Step 7: Test the Regulator
After attaching the wires, similar to step 4, switch on the Lawn Mower. It should give readings on the multimeter. If it doesn’t, that means the voltage regulator isn’t working. To be sure, start the mower further. If it still doesn’t give a reading, the regulator surely is faulty. Hence, it would be best to replace the regulator or get the mower to a mechanic for help.
Conclusion: How to Test a Voltage Regulator on a Lawn Mower?
We’ve tried to explain in detail how to test a voltage regulator on a Lawn Mower. You won’t need anything more for the testing. However, if you have already checked the battery and it’s fine, you can skip the first few steps. Directly start from step 6 to test the voltage regulator only. If you have any more questions regarding testing the voltage regulator, feel free to knock us.
Frequently Answered Questions
Can a Bad Voltage Regulator Cause Battery Drain?
A faulty voltage regulator can cause problems in charging the battery. It also can result in a battery drain. Besides, if your battery drains quickly, maybe the battery is bad, or the diode is leaky. Read more to choose the Best Cordless Lawn Edger for Your Lawn
What happens if you have a bad voltage regulator in your Lawn Mower?
A bad voltage regulator can cause various problems on your Lawn Mower. During mowing, the mower may get stopped often and don’t work properly. Besides, the battery may not get adequately charged and die early even after charging fully.
What is the difference between a regulator and a rectifier?
A rectifier and a voltage regulator are completely different things. A voltage regulator controls the flow of electricity to a range. It ensures that the machine doesn’t get too high voltage or too low voltage. Because if that happens, the machine will likely turn bad. On the other hand, a rectifier turns the AC power into DC power.