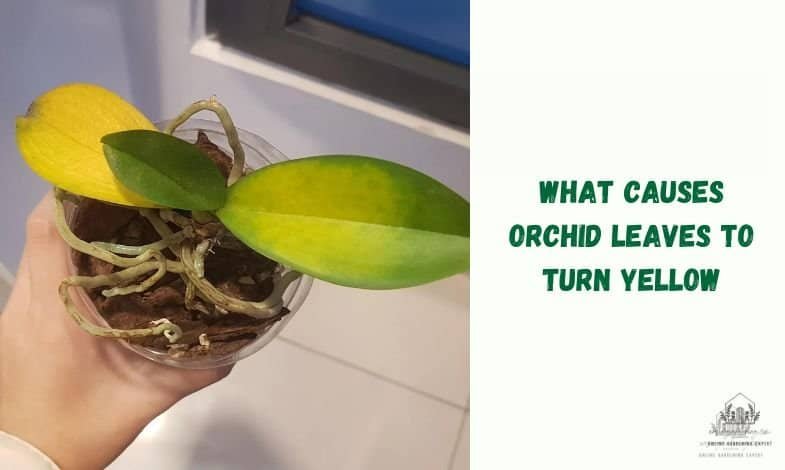
Did you know that over 70% of orchid owners face the challenge of yellowing leaves at some point? It’s a common problem, but don’t worry—you’re not alone! As orchid enthusiasts, we have been there and are here to help. In this guide, we’ll dive into the mystery of yellowing orchid leaves, uncover the culprits, and arm you with the knowledge to nurse your beloved plant back to health. Get ready to become an orchid whisperer!
Contents
- Nutrient Deficiencies
- Common Nutrient Deficiencies:
- Overwatering Woes
- Signs of Overwatering:
- Light and Temperature Factors
- Sunlight Shenanigans
- Temperature Tango
- Root Health and Repotting
- Why Root Health Matters
- How to Repot Like a Pro
- Common Issues and Diseases
- Fungal Infections
- Bacterial Infections
- Keep Your Orchids Happy: Prevent Yellow Leaves
- Nutrient Balance
- Watering Right
- Recovery and Care Tips
- Tackling Yellow Leaves
- Fighting Off Diseases
- Conclusion
Nutrient Deficiencies
Yellow leaves often mean your orchid is missing some essential nutrients. Here’s what to look out for:
Common Nutrient Deficiencies:
- Nitrogen: If the tips and sides of the leaves are yellow, your orchid might need more nitrogen. This usually starts with the oldest leaves (Woman & Home).
- Magnesium: Yellowing between the veins? That signals magnesium deficiency, especially when the plant grows fast (OrchidWeb).
- Iron: Iron might be the issue if the yellowing starts at the base of the leaves. Acidic potting media can make this worse (OrchidWeb).
- Calcium: Weak, yellow leaves could mean a lack of calcium. Keeping a balanced nutrient mix helps.
| Nutrient | Symptoms | Source |
|---|---|---|
| Nitrogen | Yellowing at tips and sides | Woman & Home |
| Magnesium | Yellowing between veins | OrchidWeb |
| Iron | Yellowing starting from the base | OrchidWeb |
| Calcium | Yellowing and weakened structure | Love Orchids |
To keep your orchid happy, use a balanced fertilizer made for orchids and check the pH of your potting mix.
Overwatering Woes
Too much water can be just as harmful as not enough. Orchids like their roots to breathe, and overwatering can suffocate them.
Signs of Overwatering:
- Yellow Leaves: Overwatered orchids often have yellow, limp leaves.
- Root Rot: Mushy, black roots are a dead giveaway. This prevents the plant from getting nutrients, leading to yellow leaves.
- Stunted Growth: Verwatering might be the culprit if your orchid isn’t growing.
To avoid drowning your orchid, ensure your potting mix drains well and follow a proper watering schedule. Check out our watering guide for more tips.
Spotting nutrient deficiencies and avoiding overwatering can keep your orchids looking their best. For more orchid care tips, see our articles on cleaning orchid leaves and watering African violets.
Light and Temperature Factors
Have you ever wondered why your orchid leaves are turning yellow? Light and temperature are the main culprits. Let’s break down how these factors mess with your orchid’s mojo.
Sunlight Shenanigans
Orchids love bright, indirect light. Too much direct sunlight? You’ll get yellow leaves with white and brown patches—classic sunburn. Not enough light? Your leaves will look pale and sad. It’s all about finding that sweet spot.
| Light Condition | Leaf Drama |
|---|---|
| Direct Sunlight | Yellow leaves with sunburn patches |
| Bright, Indirect Light | Healthy, vibrant leaves |
| Insufficient Light | Pale, dark green leaves |
If your orchid’s leaves are super dark green, it’s crying for more light. Move it to a brighter spot with indirect light (Love Orchids). White leaves? Too much sun. Find a shadier place.
Need more light tips? Check out our article on how to clean orchid plant leaves.
Temperature Tango
Temperature is another big player in orchid health. They like it just right—not too hot, not too cold.
| Temperature | Leaf Drama |
|---|---|
| Below 55°F (13°C) | Cold damage, yellowing |
| 55°F – 80°F (13°C – 27°C) | Happy growth |
| Above 80°F (27°C) | Heat stress, yellowing |
Keep it between 55°F and 80°F (13°C to 27°C) for happy, healthy leaves. Too cold? Yellow leaves from cold damage. Too hot? Heat stress and more yellow leaves.
Want to keep your orchids in top shape? Check out our guide on how to clean orchid plant leaves.
You can keep those orchid leaves green and gorgeous by nailing the right light and temperature. Happy growing!
Root Health and Repotting
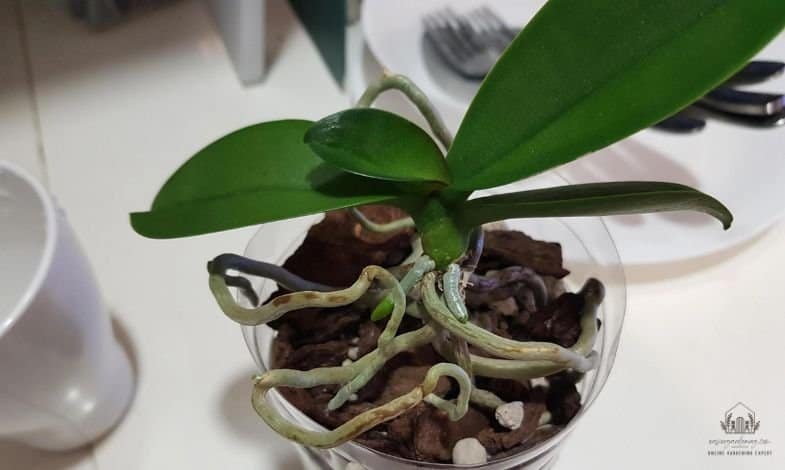
Why Root Health Matters
Healthy roots are the lifeline of your orchid. If the roots are in bad shape, your plant will show it—think yellow leaves and sad vibes. Overwatering is a big no-no; it leads to root rot and mushy roots, making the leaves turn yellow (OrchidWeb). On the flip side, underwatering leaves you with dry, pleated leaves that scream for water (Gregarious).
Keeping roots happy means finding that sweet spot between moisture and air. Your potting mix should be airy and drain well so the roots don’t sit in water and rot (Orchid Bliss). Regular checks and smart watering keep those roots—and leaves—looking good.
How to Repot Like a Pro
Repotting is vital to keeping your orchid’s roots in top shape and avoiding yellow leaves. Spring or early summer is the best time to do this. Here’s a simple guide to get it right:
- Pick the Right Pot: Choose a pot that fits the roots without squishing them. Make sure it has drainage holes to let out extra water.
- Get the Potting Mix Ready: Mix bark, charcoal, and perlite. This keeps the air flowing around the roots.
- Take the Orchid Out: Gently remove the orchid from its old pot. If it’s stuck, squeeze the pot a bit or use a sterilized knife to help.
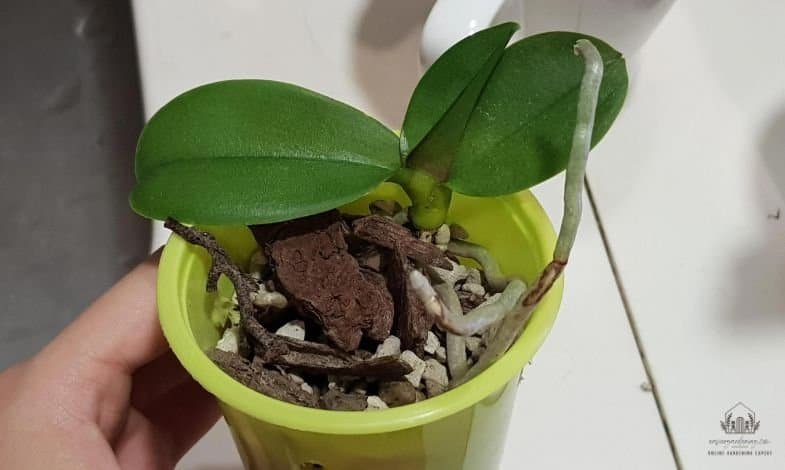
- Check and Trim the Roots: Look at the roots and cut off any dead, mushy, or black. Healthy roots are firm and white or green.
- Place in New Pot: Put the orchid in the center of the new pot and fill it with the potting mix. Make sure the roots are covered but not packed tight.
- Water Lightly: After repotting, water the orchid lightly. Wait until the top inch of the mix is dry before watering again (The Spruce).
| Step | Action |
|---|---|
| 1 | Pick the right pot with drainage holes |
| 2 | Prepare an airy, well-draining potting mix |
| 3 | Gently remove the orchid from the old pot |
| 4 | Check and trim dead or mushy roots |
| 5 | Place the orchid in the new pot and fill with a mix |
| 6 | Water lightly after repotting |
Follow these steps, and your orchid’s roots will stay healthy, keeping those leaves green and happy. For more tips, check out our articles on how to clean orchid plant leaves and how often to water African violets.
Common Issues and Diseases
When your orchid leaves start turning yellow, it can be a bit of a panic. But don’t worry; understanding the problems and diseases that hit orchids can help you get them back on track.
Fungal Infections
Fungal infections are common in orchids, usually because of too much water or high humidity. They often start as yellow spots on the underside of leaves and can turn into brown or black spots on both sides. (Just Add Ice Orchids)
Look out for:
- Yellow spots on leaves
- Brown or black lesions
- Leaves falling off
How to handle fungal infections:
- Keep the infected orchid away from others.
- Cut off the infected parts with sterilized scissors.
- Use a fungicide on the affected areas.
Good airflow and careful watering can help prevent fungal infections. Let the potting mix dry out between waterings to avoid a damp environment that fungi love. For more on watering, check out our section on proper watering techniques.
Bacterial Infections
Bacterial infections appear as yellowing leaves with spots or sunken areas where water sits. They often have a nasty smell (Orchid Bliss).
Watch for
- Spotted or sunken areas on leaves
- Bad smell
- Quick leaf yellowing
How to treat bacterial infections
- Isolate the orchid to stop its spread.
- Cut off the diseased parts with sterilized scissors.
- Apply beneficial bacteria, horticultural oil, or insecticidal soap to the affected areas.
Keeping a clean growing space and avoiding water sitting on leaves can help prevent bacterial infections. Good drainage is vital to stop water from pooling at the base of the plant, which can lead to bacterial growth. For repotting tips, see our section on proper repotting techniques.
By knowing these common problems and diseases, you can take better care of your orchids and keep them looking great. Check out our recovery and care tips section for more detailed care tips.
Keep Your Orchids Happy: Prevent Yellow Leaves
Keeping your orchids from turning yellow is all about knowing what they need and giving them the right environment. Let’s break it down into two main things: getting their nutrients and watering them properly.
Nutrient Balance
Orchids need an excellent mix of nutrients to stay healthy. If they miss out on iron, magnesium, or calcium, their leaves might turn yellow. Here’s a quick rundown:
| Nutrient | Why It Matters | What Happens If They’re Missing It |
|---|---|---|
| Iron (Fe) | Helps make chlorophyll | Leaves turn yellow between the veins |
| Magnesium (Mg) | Key for photosynthesis | Leaves turn yellow from the bottom up |
| Calcium (Ca) | Strengthens cell walls | Leaves grow weird or stunted |
To keep your orchids looking sharp, use a fertilizer made just for them. Follow the instructions on the package, and you’ll give your plants the nutrients they need to thrive.
Want more tips on keeping your orchids in top shape? Check out our guide on cleaning orchid leaves.
Watering Right
Watering orchids can be tricky. Too much water can cause root rot, which leads to yellow leaves. Here’s how to get it right:
- Feel the Soil: Only water when the top inch of the potting mix is dry.
- Drainage is Key: Ensure your pots have enough holes to let water out.
- Less is More: Water thoroughly but less often. It’s better to be a bit dry than too wet.
- Morning Routine: Water in the morning so any extra moisture can evaporate during the day, just like in their natural habitat.
| Watering Schedule | When to Follow It |
|---|---|
| Weekly | Normal indoor conditions |
| Bi-weekly | High humidity or cooler temps |
Getting the right watering and nutrients can keep those yellow leaves at bay. For more watering tips, check out our article on watering African violets.
Following these tips can keep your orchids looking fresh and green. Explore our resources on cleaning orchid leaves and watering rubber plants for more orchid care advice.
Recovery and Care Tips
Got a sad-looking orchid? Let’s get those beauties back to their prime. Here’s how to tackle yellow leaves and keep diseases at bay.
Tackling Yellow Leaves
First off, why are your orchid leaves turning yellow? Here’s the lowdown:
| Cause | Symptoms | Fix |
|---|---|---|
| Overwatering | Yellow, mushy leaves | Let the top inch of soil dry out before watering again. To avoid root rot, make sure the pot drains well. |
| Underwatering | Pleated, dry leaves | Water when the soil feels dry. Boost humidity around the plant. |
| Nutrient Deficiencies | Pale or yellow leaves | Use a balanced orchid fertilizer. Ensure the plant gets iron, magnesium, and calcium. |
| Light Exposure | Yellow and brown leaves | Move to a spot with bright, indirect light. Avoid direct sunlight. |
| Temperature Issues | Yellowing leaves | Keep daytime temps between 65-80°F and nighttime temps between 60-70°F. |
For more on watering and nutrients, check out our sections on proper watering techniques and nutrient balance.
Fighting Off Diseases
Orchids can catch all sorts of diseases. Here’s how to handle them:
| Disease | Symptoms | Solution |
|---|---|---|
| Fungal Infections | Black spots, yellow leaves | Remove affected leaves. Use a fungicide. Ensure good air flow. |
| Bacterial Infections | Water-soaked spots, lousy smell | Isolate the plant. Cut off infected parts. Apply a bactericide. |
Keep your orchids safe with these tips:
- Sanitize Tools: Always clean your tools before trimming or repotting.
- Keep It Clean: Maintain a tidy growing area.
- Ventilation: Ensure good airflow to prevent fungal and bacterial growth.
Conclusion
Yellowing orchid leaves can signify distress, but with the proper knowledge and care, you can bring your plant back to its vibrant best. Remember, every orchid is unique, so pay attention to your plant’s needs. By addressing these common causes and implementing the solutions we’ve discussed, you’ll be well on your way to becoming an orchid care expert.